

How To Get Out Of Automatic Repair Mode
A bad organisation update, a new graphics carte, corrupted system files, fifty-fifty a fresh USB mouse—any of these tin can cause a dreaded Windows 10 automatic repair loop to occur when you're trying to boot up a Windows PC.
You'll ordinarily see this error when Windows 10 tries to boot and can't, forcing itself through an countless cycle of automatically trying to repair itself. If Windows can't repair itself, it reboots and repeats the cycle. To fix a Windows 10 automatic repair loop, here'south what you'll demand to practice.
What Causes a Windows ten Automatic Repair Loop?
There isn't a single cause for a Windows 10 automatic repair loop, only there are several situations that are likely to cause information technology. Missing or corrupted system files are one of the more mutual causes, where Windows can't boot (or repair itself) because these essential files it needs to run aren't bachelor.
This prevents the Windows kernel (ntoskrnl.exe) and other essential Windows services from fully loading, preventing you from using your PC. Another issue that could cause a repair loop is a newly installed component or connected peripheral that's missing a device driver (or just isn't working correctly).
If you've recently upgraded your PC, your new components will demand device drivers to let Windows to use information technology. If the drivers are missing, out-of-date, or not supported, information technology could cause a repair loop, particularly for disquisitional components like a new graphics card.
Other problems, such as faulty components, malware infection, corrupted system registry, and even broken installation files all point to a possible cause. Thankfully, many of the fixes you tin can try below will work for most causes of a Windows 10 automatic repair loop.
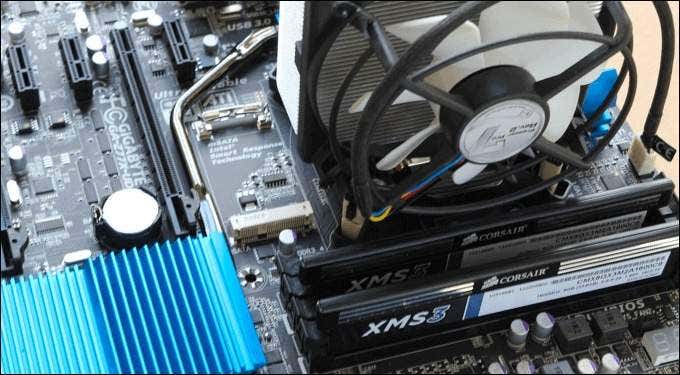
ane. Disconnect or Remove Recently Installed or Continued Devices
If you recently installed new hardware before a Windows 10 automated repair loop began to appear, then the hardware you've installed is a likely cause of the problem.
This is ordinarily because of a missing driver or commuter disharmonize. Device drivers allow Windows to interface the hardware (such every bit your graphics menu) with the software (Windows services and third-party software). If the drivers are missing or broken, this can terminate Windows from booting up properly.
In most cases, removing the problematic device volition let Windows to skip over the effect. If Windows boots with the device removed, you lot tin can then await at installing new drivers or replacing the component. For instance, installing a new graphics card could require you to download and install drivers from the manufacturer'due south website.
2. Run System Repair Tools (Chkdsk, SFC)
If you lot tin't immediately trace the cause of a Windows 10 automated repair loop, the best thing to practice is offset with some common organisation repair tools. While Windows can't kicking, y'all can normally force Windows to boot to a command prompt window using the Avant-garde Options menu screen.
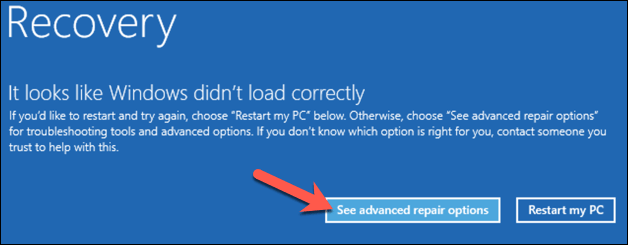
- To exercise this, restart your PC and press the F8 key on your keyboard earlier the Windows logo and spinning icon appears (you may need to echo this footstep a few times). This should cause the Windows boot troubleshooting menu to announced. Select See advanced repair options to begin.

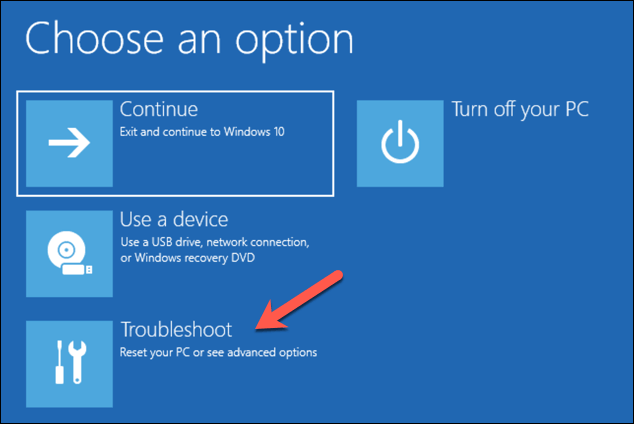
- In the Choose an option menu, select the Troubleshoot choice.
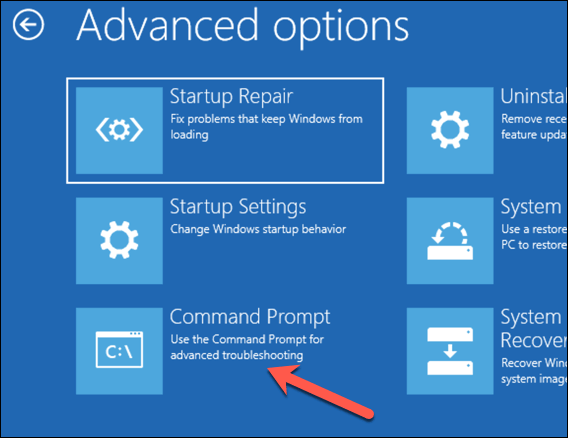
- In the Troubleshoot menu, select the Advanced options option.
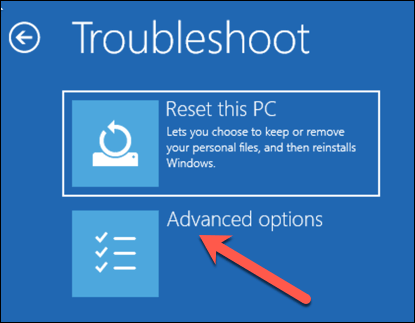
- Select Control Prompt in the Advanced options menu to boot to a minimal version of Windows, showing only a command prompt window.

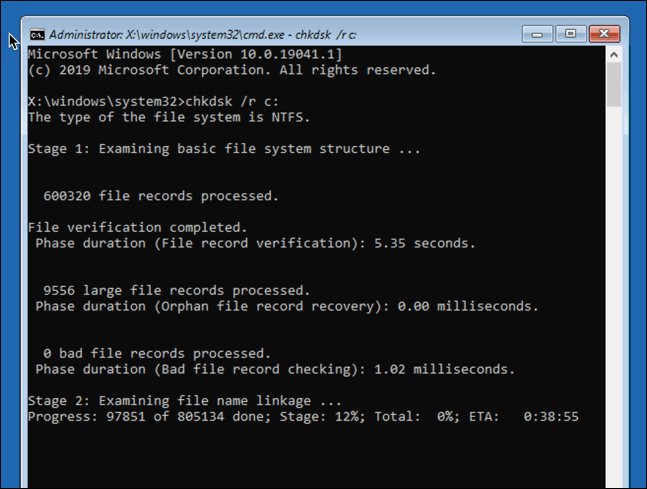
- In the command prompt window, type chkdsk /r c: to begin a low-level check of your system drive for errors using the Check Deejay utility. If it detects errors, chkdsk will automatically repair them (if possible).
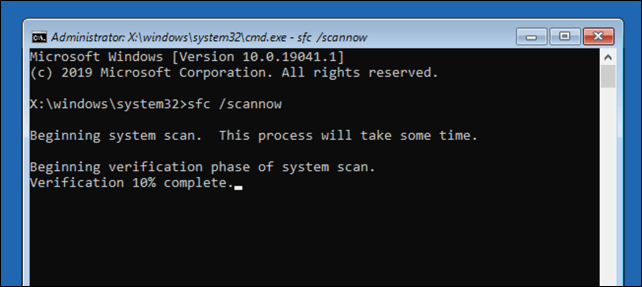
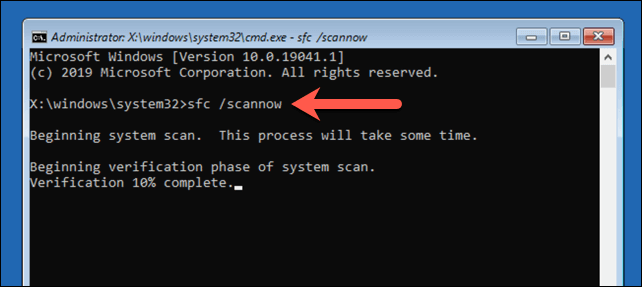
- Side by side, y'all can cheque the integrity of Windows system files by using the System File Checker tool. Type sfc /scannow to begin. This could take some time to consummate.
- Once you lot're finished, press the cross (10) icon in the tiptop-right to shut the command prompt window and restart your PC.
3. Run the Windows 10 DISM tool
The System File Checker utility to a higher place will fix organization files using a local Windows paradigm. If sure files get corrupted, Windows will replace them with the local image, but if this image itself has go corrupted, Windows can't repair itself.
To overcome this, yous can use the DISM (Deployment Image Servicing and Direction) tool to repair your system files beginning.
- To practise this, press the F8 primal during boot up, and then select Run across advanced repair options.
- In the kick troubleshoot bill of fare, select Troubleshoot > Advanced options > Startup Settings > Restart.
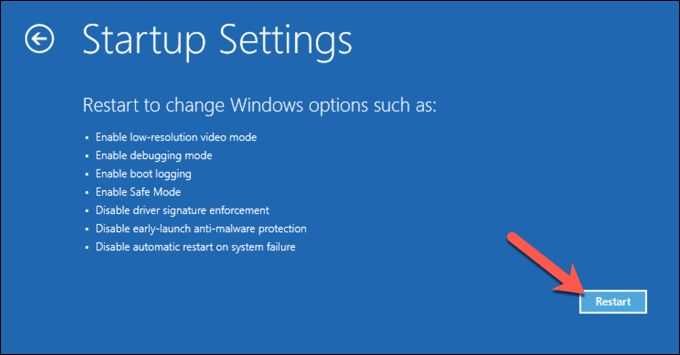
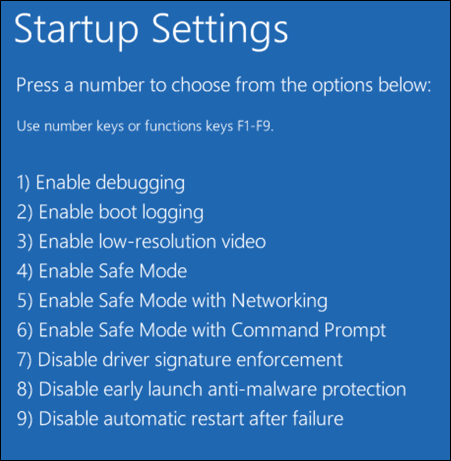
- At the next stage, select Enable Safe Mode with Networking by selecting the 5 number fundamental (or F5) on your keyboard. Windows will boot upwards to Safe Way, with only minimal services enabled.
- Once Windows boots up in Safety Way, right-click the Start card and select Windows PowerShell (Admin).

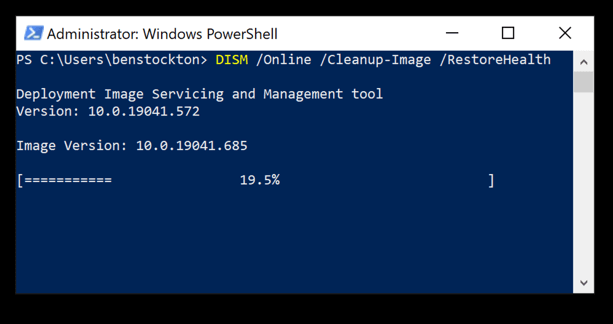
- In the PowerShell window, type DISM /Online /Cleanup-Epitome /RestoreHealth and let the process to complete, which could take some time.
- When the DISM tool finishes running, reboot your PC and use the steps to a higher place to boot into a command-line window, repeating the SFC command (sfc /scannow) to ensure Windows is fully repaired.
4. Disable Automatic Startup Repair to Limit Boot Loops
If you're confident that a Windows ten installation is still functional, so information technology'southward possible to disable the automatic startup repair organization. This should let you to kick into Windows without the repair loop taking place.
This will only work if Windows is working properly, however. If it isn't (and you all the same can't kicking), you may need to consider more drastic fixes (such equally restoring Windows) afterwards.
- To offset, press F8 and wait for the boot troubleshoot menu to load, selecting See avant-garde repair to proceed.

- In the boot troubleshoot bill of fare, select Troubleshoot > Advanced options > Command Prompt, then wait for the command line window to open. Yous may need to authenticate with your local or Microsoft account password first.
- In the command line window, type bcdedit and double-check the values for identifier and recoveryenabled. The identifier value volition usually appear as {default}, with recoveryenabled listed equally yes.
To change this, type bcdedit /set {default} recoveryenabled no to disable automated boot repair.
If yous're running this command from a command line or PowerShell window in Safe Manner, yous may need to supercede the identifier value to {electric current} instead (e.one thousand. bcdedit /fix {electric current} recoveryenabled no).

- Press the cross (X) icon in the top-right to reboot your PC. If Windows tin can boot, you should be able to sign in as normal at the next phase.
Maintaining a Healthy Windows 10 Installation
If Windows 10 is still in an automatic repair loop (or if it has other issues that prevent it from booting up properly), y'all may need to consider more drastic repair methods, such as wiping and reinstalling Windows. This may lose your local saved files, so be sure to support your hard bulldoze before you begin.
In one case you've managed to fix the repair loop using the steps to a higher place, yous'll need to make sure you lot maintain a good for you installation with regular arrangement maintenance. Keeping Windows updated with new device driver updates and important system upgrades is essential.
If updates become stuck or if updates just won't install properly, don't forget to endeavour some simple fixes, from a quick restart to running the Windows Update Troubleshooter. Updating isn't the just thing you can do to boost your PC performance, however—fifty-fifty cleaning your PC volition have a positive affect.
Do not share my Personal Information.

Source: https://helpdeskgeek.com/windows-10/how-to-fix-a-windows-10-automatic-repair-loop/
Posted by: nortondregat.blogspot.com
0 Response to "How To Get Out Of Automatic Repair Mode"
Post a Comment