

How Do You Repair Drywall After Removing Drywall Anchors
Sheetrock Repair: How to Patch and Repair Holes in Drywall
Dan is a licensed electrician and has been a homeowner for 40 years. He has about e'er done his own repair and improvement tasks.
Communication on how to patch and repair drywall.
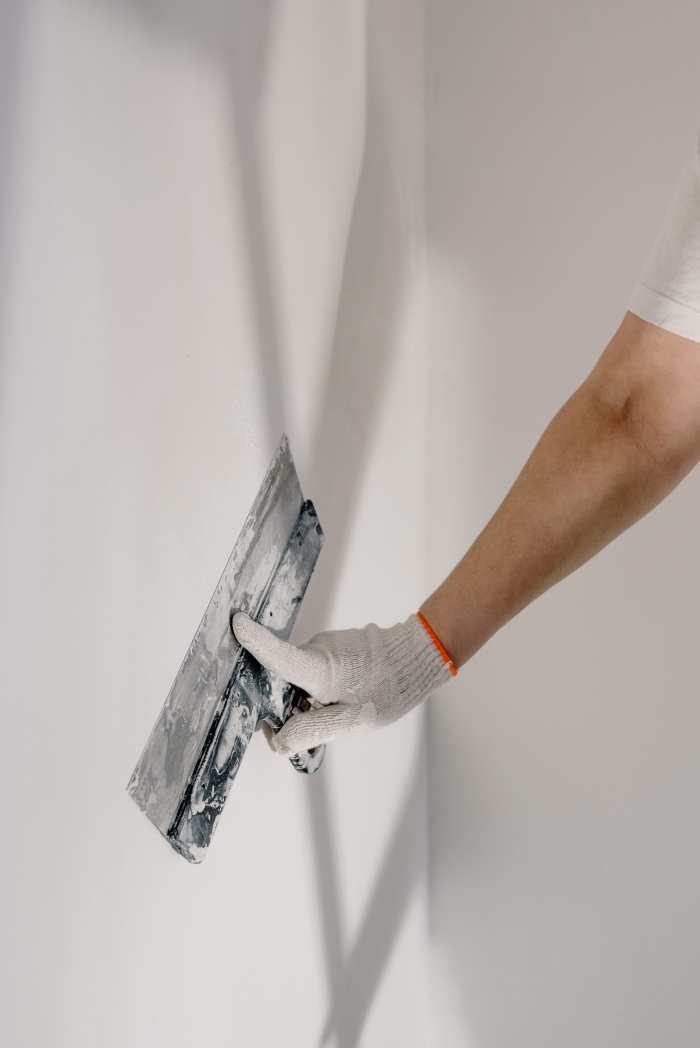
Photo by Ksenia Chernaya from Pexels
Sheetrock Repair: Patching Holes
Patching and repairing holes in drywall is something well-nigh every homeowner will face sometime. While drywall (sheetrock is a trade proper noun) is a wonderful wall covering, with quick installation and cheap cost, it is not the nigh durable.
Withal, repairing sheetrock is non hard. Patching even the largest holes in drywall is within the abilities of nearly every homeowner; information technology's not expensive and does not require a large inventory of tools or materials.
In full general, this chore can be divided into three separate categories: small holes around one-inch in size or smaller, medium-size holes upwardly to eight to 10 inches, and larger holes. Each size is treated somewhat differently and volition be addressed separately.
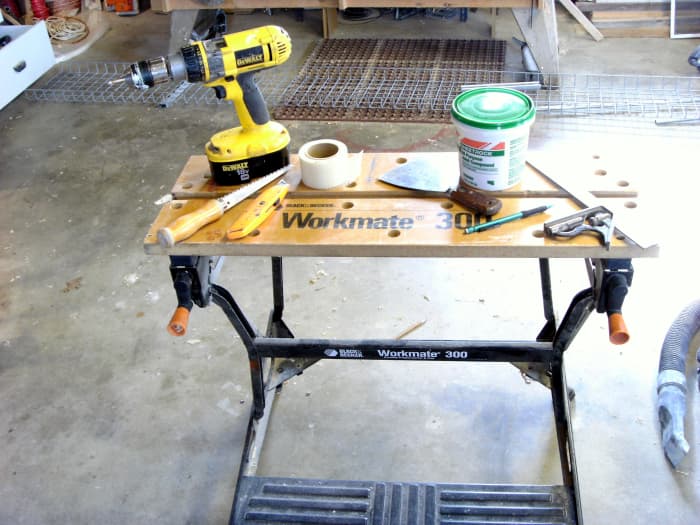
Tools for Repairing Sheetrock
Pictured higher up are common tools used for patching holes in drywall. The pocket-size holes will non require the cordless drill nor will they need the rock saw.
- The stone saw pictured makes quick work of cut drywall, just a razor pocketknife will do the job with a lilliputian more effort.
- The cordless drill pictured is used to drive screws in the patching of larger holes; a screwdriver volition piece of work but volition over again crave more effort to complete the work.
- The folding Black and Decker workmate bench is not required; information technology is just used as a prop for taking the photo. While it makes a squeamish addition to your workshop, it won't be used to patch drywall.
- Often it is more user-friendly to only purchase a small patching kit instead of buying a roll of drywall record, a drywall knife, and drywall mud; several such kits are featured here.
- Some blazon of drywall pocketknife or putty knife volition be necessary. Some patching kits come with a pocket-size plastic knife that, while serviceable for minor jobs, is non ideal. Preferable is a 4" or vi" drywall pocketknife, with preference given to the 6" size. While you will non be finishing an unabridged wall of drywall, using the smaller four" size makes it difficult to smooth the drywall mud of larger areas.
- Drywall tape will be used for all but the smallest holes, with the mesh type being preferred for small holes. Newspaper tape is quite adequate for patching larger holes in your drywall.
- A small amount if drywall mud volition be needed; this can be purchased in 3-pound tubs or even smaller sizes. It volition not final forever, even in the can, so don't buy far more than is needed. Any drywall patch can be done with the 3-pound size.
Patching and Repairing Smaller Holes
Repairing modest areas of sheetrock damage is by far the easiest and simplest job. Small holes are categorized as those damaged areas of around one" in size: if information technology is much bigger than your thumb, you should probably check out the side by side department.
- At the elevation of this list are those holes made by nails or other similar very pocket-sized holes. These can be patched with nothing more than a daub of drywall mud or even toothpaste on the tip of your finger; simply push it into the hole and smoothen it out. Excess drywall mud tin can be removed with a damp sponge afterwards drying or by sanding.
- A larger hole, up to about i", can be repaired with merely a little effort. Clean the pigsty out with a razor knife, sloping the sides so that the outside of the pigsty is slightly larger than it is on the inside of the wall.
- Using mesh drywall record or the patches supplied with a drywall repair kit stick the patch over the hole.
- Encompass the mesh patch with drywall mud, pressing it firmly onto the patch and into the hole with the drywall knife. This should be a fairly thin glaze of mud, leaving the mesh record visible.
- Feather the edges out to zippo about 2 or iii inches from the patch. Endeavour not to go out whatsoever ridges or bumps of mud, but if you do, they can be sanded off quite hands. Let dry: some types of mud will dry in only a couple of hours while others will take 24 hours. Check the instructions on your mud.
- Sand the patch lightly, beingness conscientious not to push button hard on the pigsty. Apply a second coat of mud over the unabridged area, extending it out to around iv" outside the hole all around.
- Allow dry once more than and sand again. If the wall is smooth, be enlightened that any imperfection will be visible on the painted wall. If any can be found, repeat the mudding process for a tertiary and terminal time.
- If the wall is textured, wall texture may exist purchased in different texture appearances and only sprayed on the wall. When dry out, paint to match the surrounding expanse. If you are painting the unabridged wall, this is a bully time to patch all of the small (and larger) holes in your drywall as information technology volition greatly enhance the finished wall.
This type of patch is quite weak and easy to damage again. For that reason, just small-scale areas are normally patched in this manner. Some kits advertise that holes upwards to several inches across may exist repaired, just it is not recommended unless the damaged surface area is high on the wall or in some other way relatively inaccessible.
Sheetrock Repair of Small Holes
Patching and Repairing Mid-size Holes
Next in line are the mid-sized holes, ranging from around one" to well-nigh x" in diameter. It is apparently impossible to simply fill up a hole 10" across with mud, and so a dissimilar method is necessary. Some form of bankroll to hold the mud in place is required.
Roll to Go on
Read More From Dengarden
The simplest method here, and probably the ane most used, is to provide a wooden backing behind the pigsty and comprehend that backing with new sheetrock.
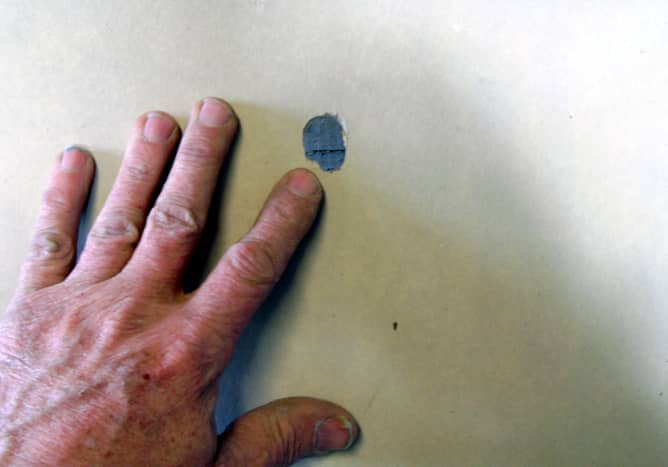
- Start by drawing a square around the pigsty, completely enclosing it. In the beneath photo, a magic marker was used as information technology shows up better in the photograph, but don't do this! A magic marking may well bleed through the mud and paint, showing through the finished chore. Use a pencil.
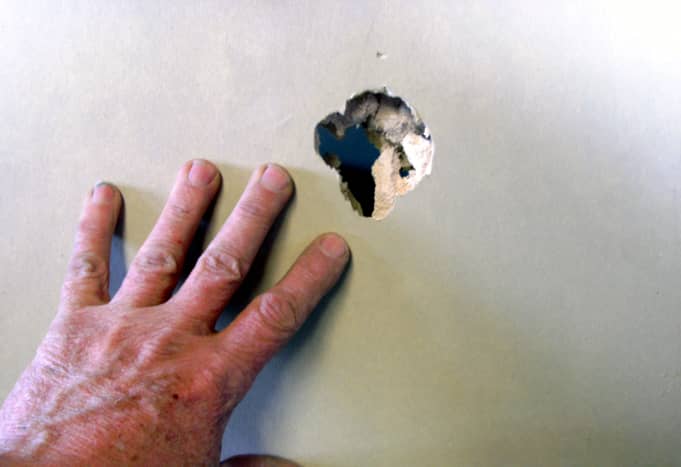
- Cut out the square yous have drawn using a rock saw or utility (razor) pocketknife. The stone saw is quicker and easier, simply utility pocketknife is more mutual; either will work fine. Information technology is all-time if the hole is perfectly square (using a carpenters foursquare will help) as a patch must now be cut from some scrap drywall, sized to simply fit into the hole. Make sure the patch is the same thickness every bit the drywall on the wall being repaired; most homes use ½" drywall.
- Y'all will need a pocket-size piece of board, a little narrower than the hole and about 4" taller. The photo below shows the board to be used; a screw was driven into the center of the board to use as a handle. Insert the board into the square hole you accept cut into the wall and drive a screw through the remaining drywall into the lath above and below the cut opening. Larger openings should accept 2 screws both above and below. The "handle" may at present be removed from the lath. Larger holes in the eight or 10-inch size should have 2 boards or 1 wider one.
- The patch is now inserted into the pigsty and screwed to the board backside it. 2 screws are unremarkably all that is required here unless the hole is large. Drive the screws in until they are just barely into the drywall; if the drywall knife is passed over them, you lot should not exist able to detect where they are. The photo shows the correct placement.
- Drywall record is at present applied all the way effectually the patch, covering the seam between the patch and the existing wall. Either paper or mesh tape is fine here.
- When the taping mud is dry, apply a second coat. When the second coat has dried, sand lightly to polish the surface (100 grit sandpaper works well) and employ a third glaze equally necessary.
End the wall as desired, either with spray-on texture or left smooth, and pigment. This patch is much stronger than the patch used for small holes in drywall and can be expected to last indefinitely.
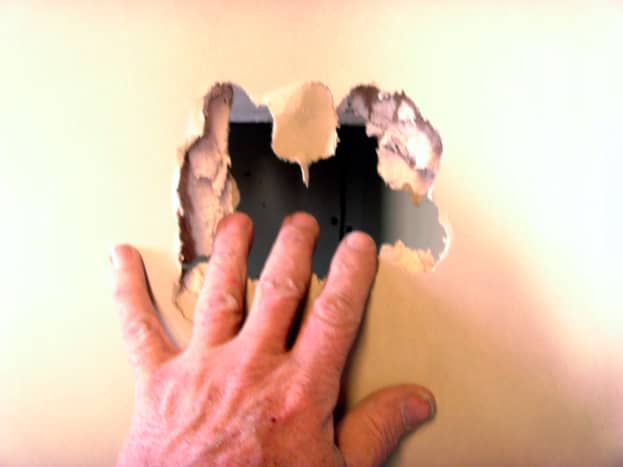
Sheetrock Repair of Larger Holes
Patching and Repairing the Largest Holes
The largest holes, greater than around 12" in bore, will require a different prepare. Patching a pigsty a foot across by using the existing drywall as a support will effect in a patch that is all too easy to destroy again, the answer is to use the studding in the wall as support.
- Begin by drawing a horizontal line higher up and beneath the hole, preferably by using a level to get it actually horizontal.
- Begin cutting above the hole and cut towards the side until a stud is encountered. Finish there and cut the other direction until the studding on that size is found. As you will be cutting clear to the stud, exist aware of any possible electrical or plumbing in the wall and cutting carefully.
- Using the cuts as a guide, draw a line downward each stud near the center of the stud. As studs are 1½" wide, measure out ¾" from the end of each cut to find the eye of the stud and draw a line between the two cuts. Yous will likely notice a smash or spiral when cut down the stud; if and then simply remove it.
- Cutting down the centre of the stud to make a large square hole that extends into the stud on each side. A utility knife works best here.
- Cut a piece of scrap drywall simply smaller than the hole then that it volition fill up the pigsty when set over the studs and fasten it into place with either screws or nails. Drive either ane simply into the drywall; the idea is to take it just below the surface of the drywall without breaking the drywall paper. The department above shows a photo of properly driven screws.
- Tape and mud the seam all the way effectually. For instructions on how to record a joint, refer to this hub on taping and finishing drywall. When the tape coat is dried, sand lightly and apply a second coat. When that coat is dried, sand again and apply a third, concluding, coat of mud as necessary. Sand every bit necessary.
The wall may be left smooth or textured with the spray tin wall texture featured above.
Sheetrock Repair of Large Holes
This article is accurate and truthful to the all-time of the writer'due south cognition. Content is for advisory or entertainment purposes simply and does not substitute for personal counsel or professional person advice in business, financial, legal, or technical matters.
© 2022 Dan Harmon
Dan Harmon (author) from Boise, Idaho on February 01, 2022:
Eventually, nigh everyone volition take a hole or two that needs patching, and will have to learn how to practise this minor repair.
Glad you found the hub and photos useful, and capeesh the compliment.
myawn from Florida on February 01, 2022:
A very informative hub nifty photos I actually had a mobile dwelling where I had to learn how to do this drywall patching. Give thanks Yous!
Related Manufactures

Source: https://dengarden.com/home-improvement/sheetrock-repair-how-to-patch-and-repair-holes-in-drywall
Posted by: nortondregat.blogspot.com
0 Response to "How Do You Repair Drywall After Removing Drywall Anchors"
Post a Comment